This delightful bread combines the nutty flavour of spelt flour with a simple, straightforward method that even novice bakers can master. The use of a Dutch oven not only helps to create a perfectly crispy crust but also ensures that the bread remains moist and fluffy on the inside.
This spelt bread recipe is not only easy to follow but also packed with nutritional benefits. Spelt flour is an ancient grain that is rich in fiber, protein, and essential vitamins, making it a fantastic alternative to regular wheat flour.
The process involves mixing the spelt flour with water, salt, and a touch of yeast, allowing it to rise beautifully before being baked to perfection.
The Dutch oven method traps steam, which is crucial for achieving that artisan-style crust that you often find in bakeries. Each loaf is a testament to the simplicity and goodness of homemade bread.
The health benefits of spelt are the ability to help regulate metabolism, aid in the creation of sex hormones, increase circulation, build strong bones, improve the immune system, boost digestive function, and lower blood sugar and LDL cholesterol levels in the body.
Also, spelt is a rich source of protein, dietary fibre, several B vitamins, and numerous dietary minerals, with high contents of manganese, phosphorus, and niacin. It contains about 70% carbohydrates, including 11% dietary fibre, and is relatively low in fat.
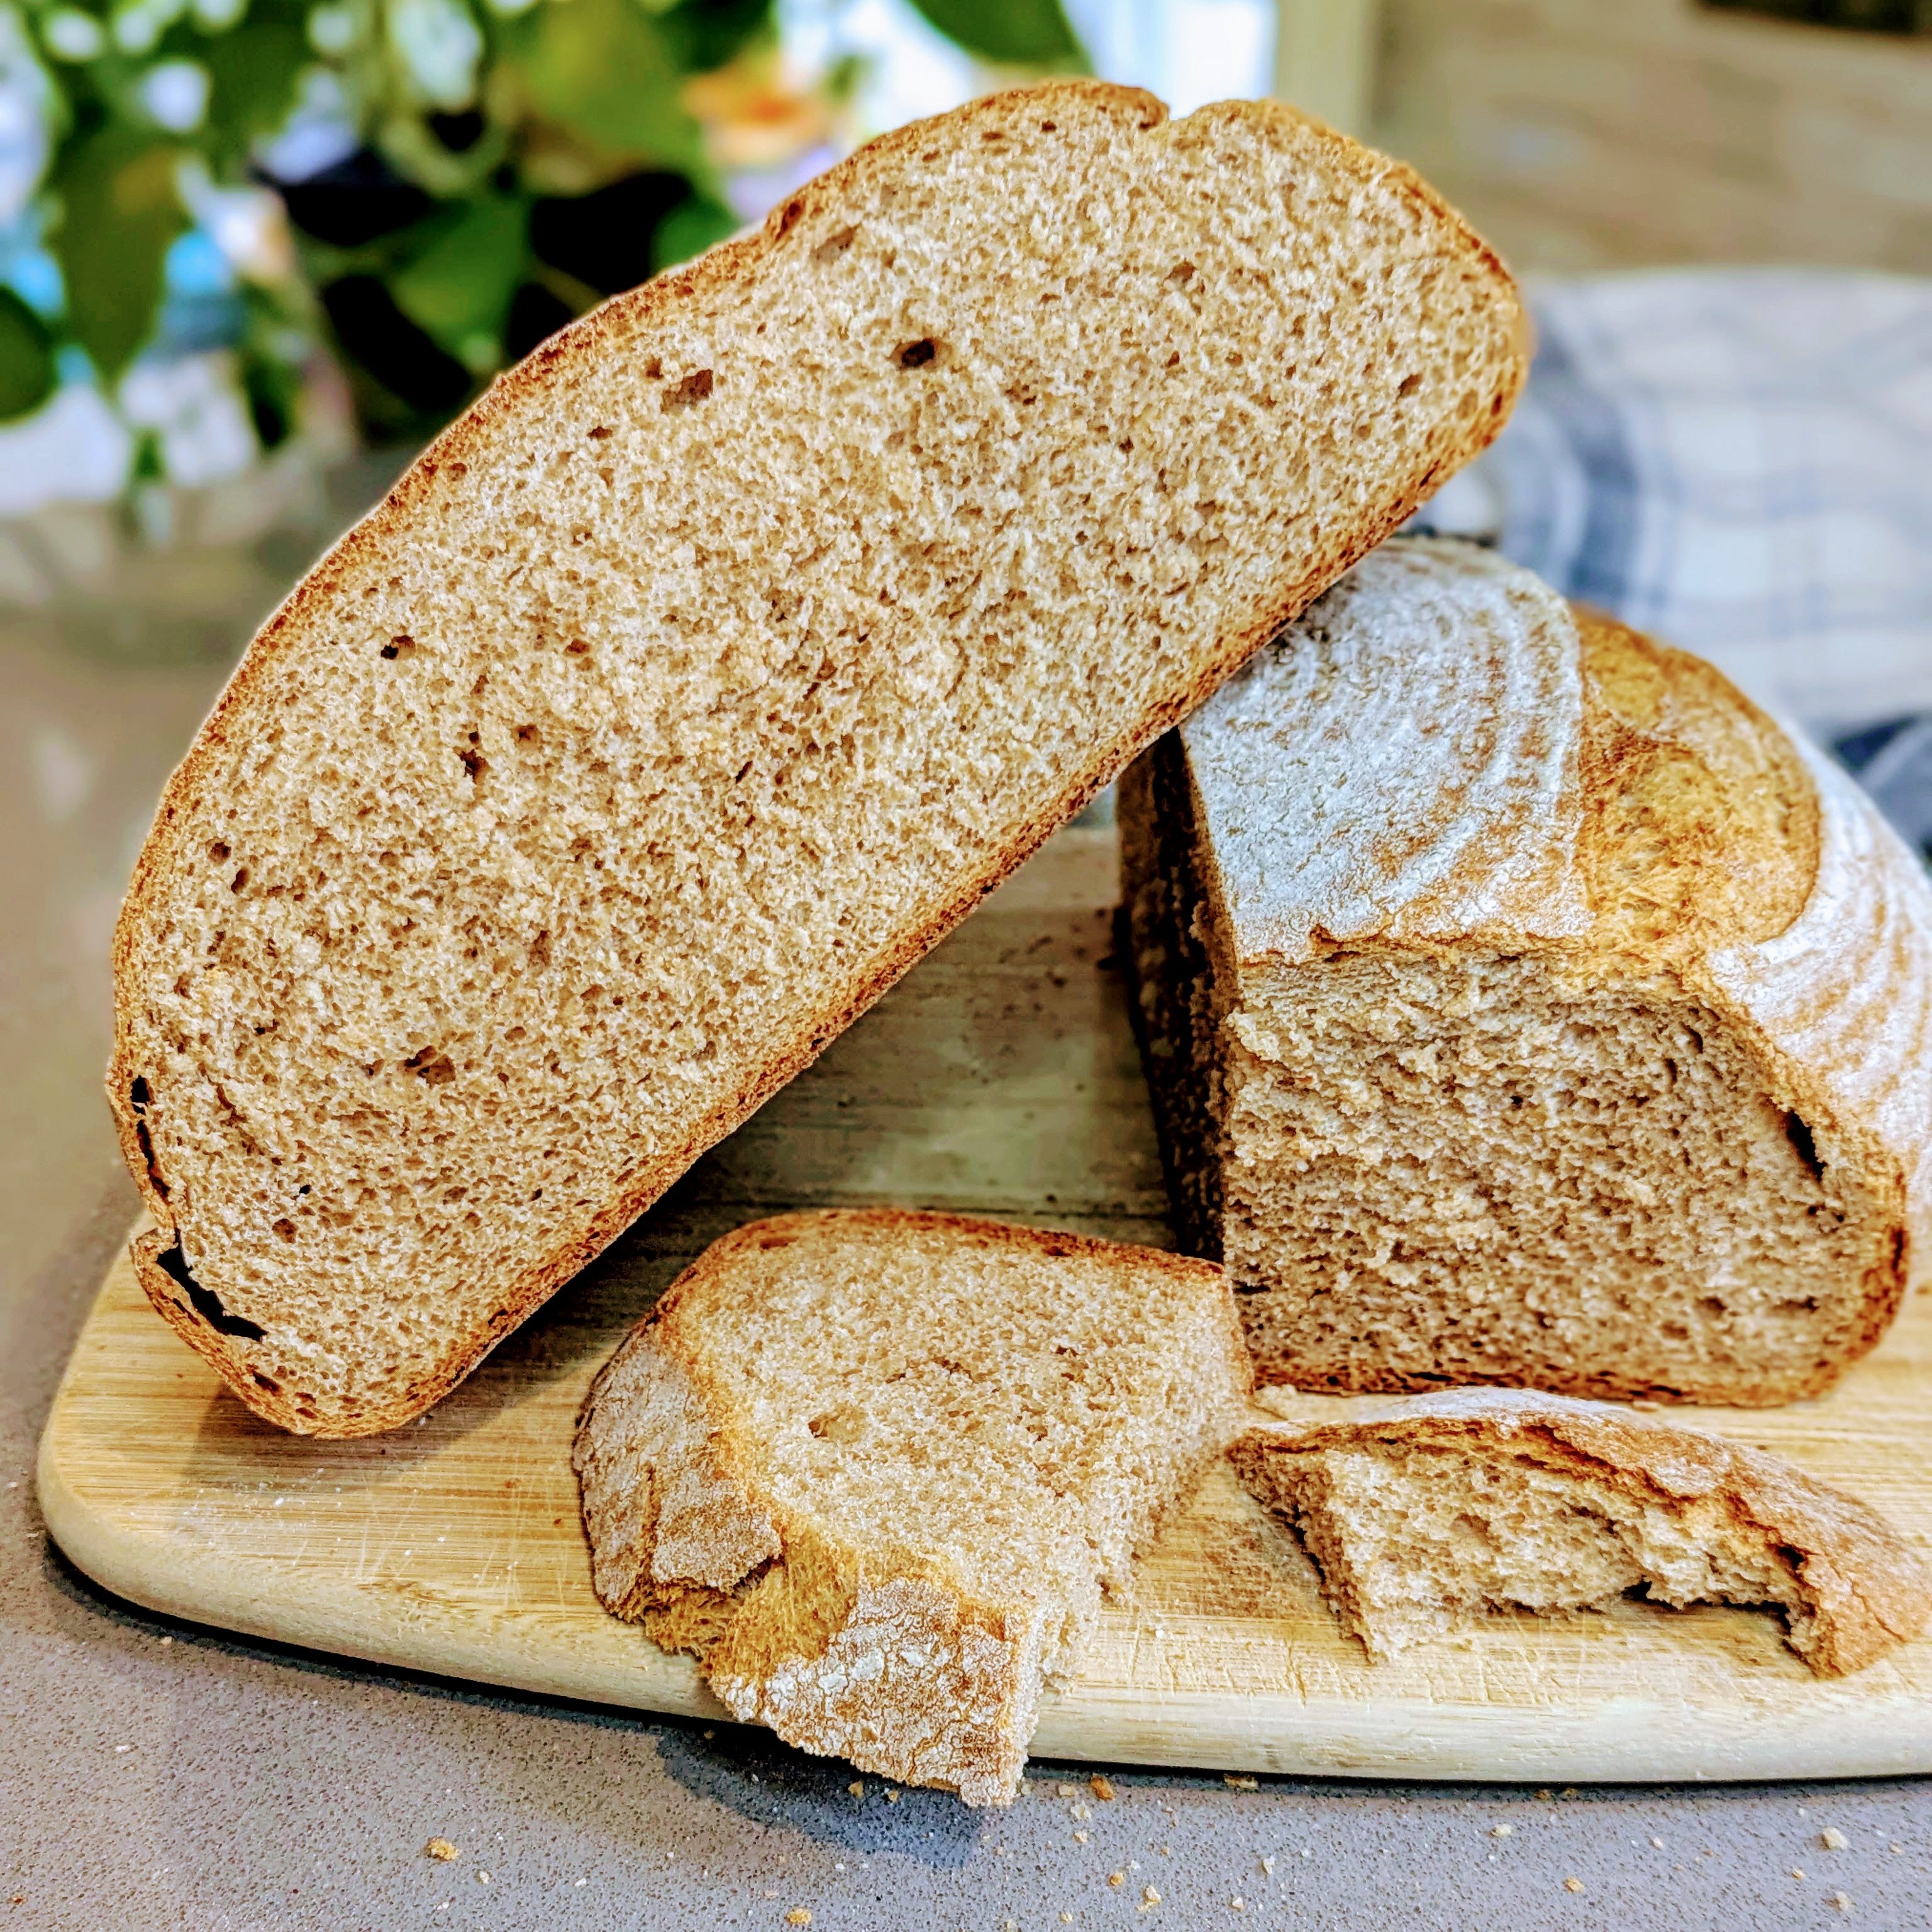
Spelt or ancient grain has a lighter flavour than traditional whole wheat, and is slightly sweeter, with a pleasing nuttiness.
There are two types of spelt flour:
- White spelt flour: It is refined, with the bran and germ removed.
- Whole spelt flour: It has the bran and germ intact. Both versions are used in baked goods and contain gluten.
Is Spelt flour gluten-free?
No, Spelt flour is not gluten-free. However, it contains a different type of gluten than modern wheat, which may be easier to digest for some individuals with gluten sensitivities.
When selecting spelt flour, consider your baking needs:
- White Spelt flour is finely milled with a light colour, ideal for all-purpose baking, including cakes, cookies, and breads.
- Whole Spelt Flour is made from the entire spelt grain, including the bran and germ, excellent for hearty bread, muffins, and pancakes.
- Baking time and temperature for spelt bread is best to bake at lower temperatureas Spelt flour can brown more quickly than all-purpose flour. Reduce the oven temperature by 25-50 degrees Fahrenheit to prevent over-browning.
Creative topping and filling ideas:
- Garlic Bread: Mix up butter with minced garlic, parsley, salt, and pepper until smooth. Smear the mixture generously over the dough and roll up as strudel. Bake in regular bread pan at 400F for 40-45 minutes.
- Sandwiches: slice the bread and load it up with your favourite deli, hummus and veggies, or turn it into a gooey grilled cheese sandwich. And so on….
Storage
- Let it cool for at least an hour before slicing. I know it’s tempting but try to resist! If you cut your bread when is still hot-warm it will become gummy and it will dry out much faster.
- Keep it in a plastic bag or airtight container for up to 4 days at room temperature or in the fridge.
- Wrap it in a clean towel to prevent it from drying out.
- Freeze it in slices or whole loaves, wrapped in plastic and foil, for up to 6 months.
- Reheat it in the toaster or oven.
Ingredients
450 g Whole spelt flour
250-300 g whole wheat flour
500 ml warm water
10 g active dry yeast ( mix with 1 tbsp spelt flour, 2 tbsp of water to activate yeast)
15 g sugar
30 ml oil
7 g salt
Preparation :
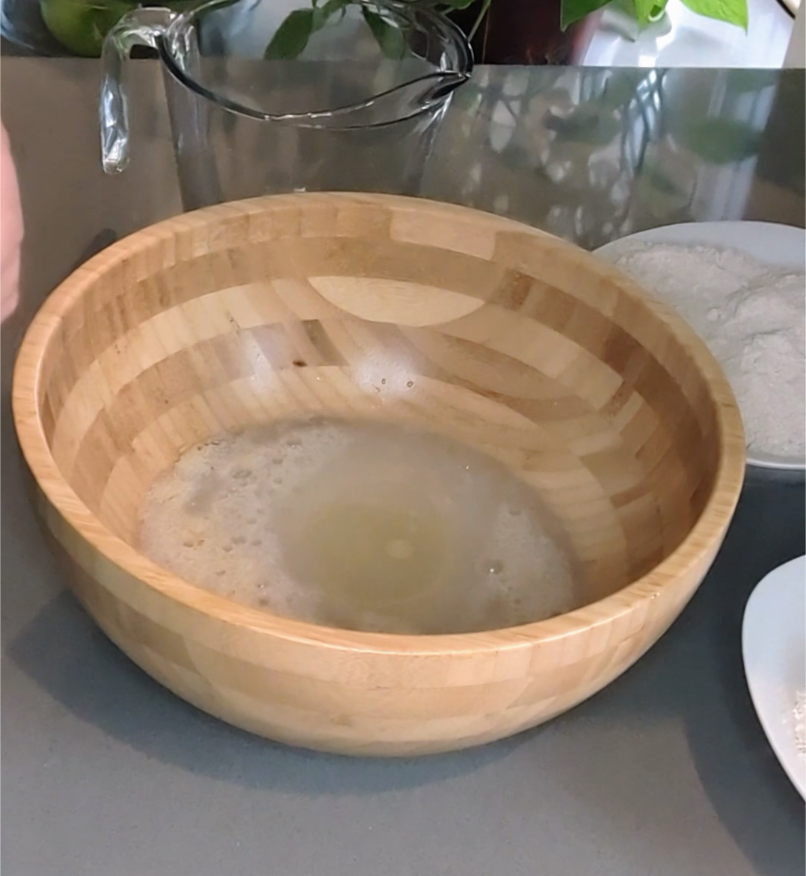
Prep and scale all ingredients. Mix yeast with sugar and 2 tbsp of warm water to activate yeast.
Mixing dough
- In a bigger bowl add warm water ( ideal temperature around 105 F -40 C). Then add activated yeast, and oil. Using a wooden spoon, mix in whole spelt flour until it is all nicely incorporated. Add ⅔ of whole wheat flour and salt and continue to mix until all combined. This is the first phase of mixing dough where flour and other dry ingredients are hydrated.
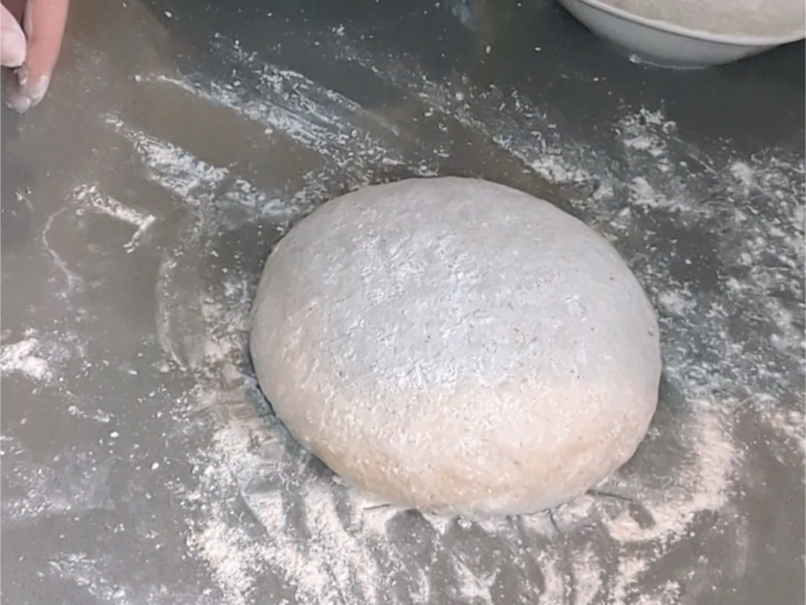
- Phase 2 knead the dough for 4 minutes and leave to rest for 4 minutes covering the dough with a clean kitchen towel.
- Phase 3 is the final phase where you mix the dough for another 4 minutes until gluten becomes smooth and elastic.
Proofing:
- Place the dough in an oiled bowl big enough for the dough to double in size. Cover the bowl and let the dough rise at room temperature (about 80 F-27C) for one hour.
- After an hour fold the dough in a bowl then knead it on a lightly floured surface just to form a smooth round ball.
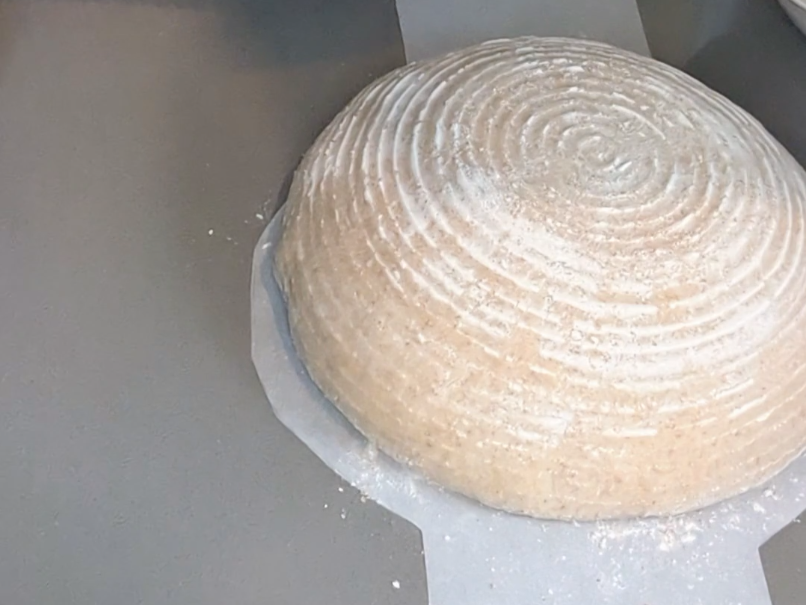
- Place the dough in a floured basket to rise (because I will bake it in a Dutch oven) for 30-40 minutes or until almost doubled in size. You can use 2 small bread pan and let it rise in it. let it do final proofing.

Baking
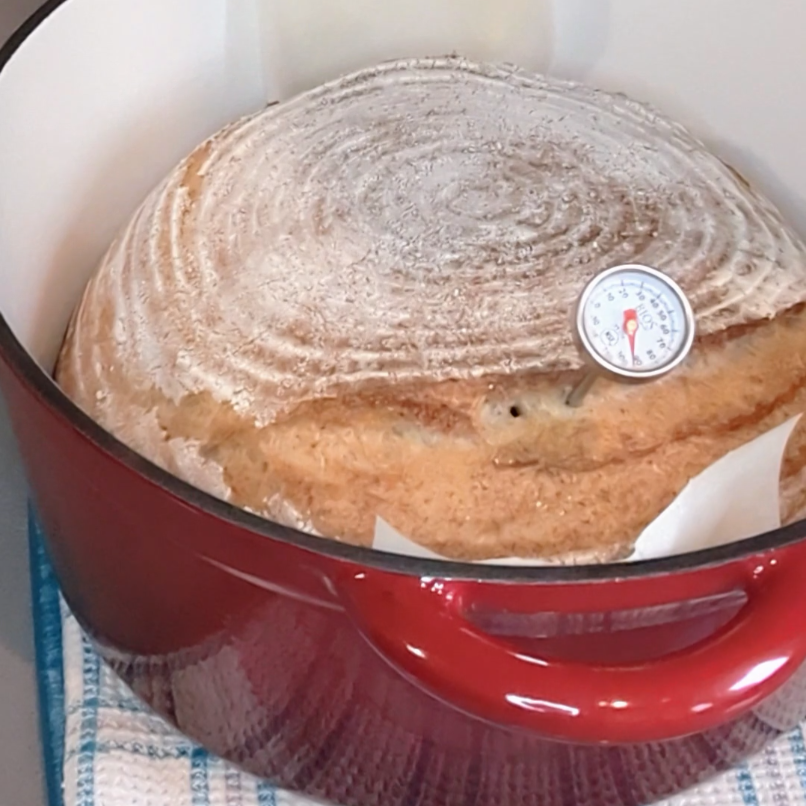
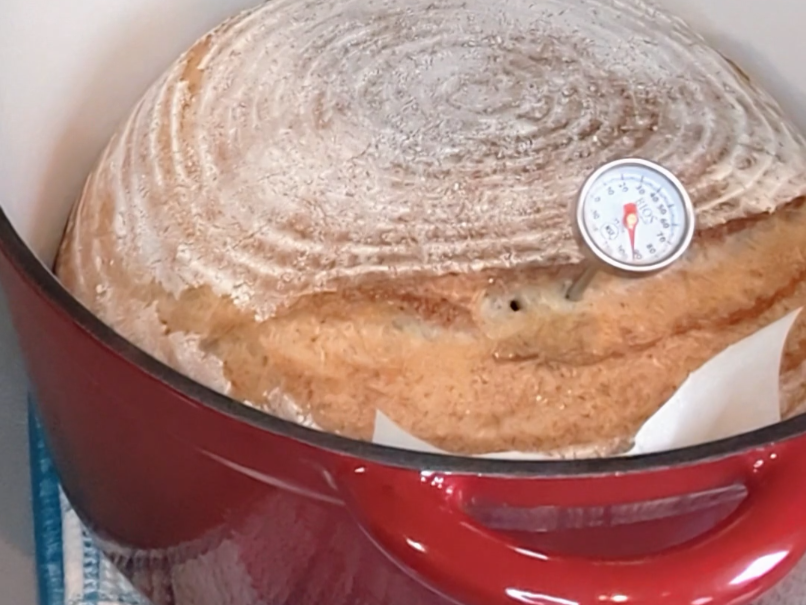
- While waiting for the dough to proof place a 6-quart Dutch oven (or heavy cooking pot with oven-safe lid) inside the oven. Preheat the oven to 425F (218˚C) with the pot inside for 30-40 minutes.
- Carefully remove the pot from the oven and place it on a trivet or heat-safe surface. (Be careful! It’ll be VERY HOT.)
- Turn the proofed dough onto lightly floured parchment paper, cut the bread on two sides and carefully place it inside the pot, together with parchment paper. It is much easier.
- Cover with the lid and return the pot to the oven at the same temperature.
- Bake for 20 minutes, then remove the lid and bake for an extra 20-25 minutes or until the bread reaches 205-208 F (95-97 C)
- Remove the bread from the pot and let it cool on a cooling rack for at least 30-60 minutes before slicing.
- Enjoy! Bon Appetit.
NOTES
Watch the Video: To better understand the recipe, I recommend watching the video recipe, which includes a step-by-step guide to help you succeed. Did you make this recipe? Please leave a comment and follow for more videos and recipes.

One Comment Add yours