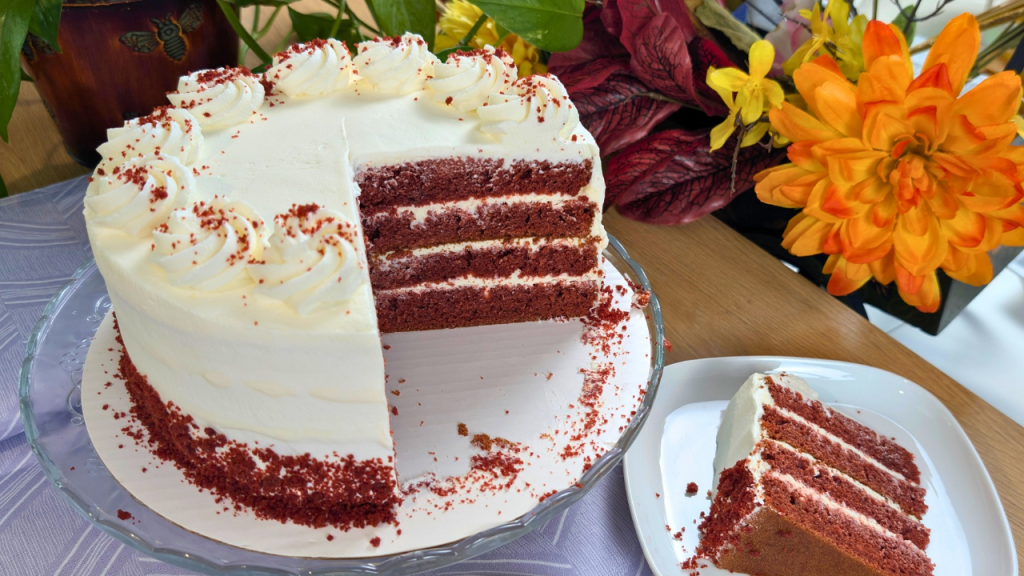
Velvety soft layers, creamy filling, and iconic crumbs – a showstopper cake for any celebration.
If there’s one cake that instantly evokes romance, elegance, and indulgence, it’s the Red Velvet Cake. With its vibrant hue and perfectly balanced flavour – a subtle cocoa richness and gentle tang – this cake has earned a spot among the most iconic desserts.
Whether you’re celebrating a birthday, anniversary, or just indulging in a baking day, this two-layer beauty, complete with velvety cream cheese filling and signature red cake crumbs, is sure to impress.
A Slice of History: What is Red Velvet Cake?
Red Velvet Cake dates back to the early 1900s in the United States, originally popularized by the Waldorf-Astoria Hotel in New York. During the Depression era, food colouring companies like Adams Extract helped make it famous by giving away free recipes to promote red food dye.
Its signature red color once came from the natural reaction between cocoa and acidic ingredients like buttermilk and vinegar. Today, red coloring boosts its dramatic appearance, while the tender crumb, light cocoa flavor, and tangy cream cheese filling make it unforgettable.
📋 Ingredients
Yield: Two 8” (20 cm) round cakes
✨ For the Cake
- 400 g all-purpose flour
- 3 tbsp cocoa powder
- 1½ tsp baking soda
- ½ tsp salt
- 4 large eggs
- 150 ml vegetable oil
- 1 tsp white vinegar
- 350 g granulated sugar
- 1½ tsp vanilla extract
- 2 tsp red velvet color bakers’ emulsion
- 400 ml buttermilk
🧁 For the Cream Cheese Filling
- 125 ml liquid whipping cream
- 500 g cream cheese, room temperature
- 130 g icing (confectioners’) sugar
- 2 tsp vanilla extract
🧑🍳 Instructions
🔥 Step 1: Bake the Cakes
- Preheat oven to 350°F / 175°C. Line two 8” (20 cm) round pans with parchment paper.
- In a large bowl, sift together flour, cocoa, baking soda, and salt.
- In another bowl, beat eggs, oil, sugar, vanilla, food coloring, and buttermilk on medium-high speed until well combined and evenly colored.
- Add the wet mixture to the dry ingredients and mix until just combined.
- Divide batter evenly between the pans.
- Bake for 35–40 minutes, or until a toothpick comes out clean.
- Cool in the pan for 10 minutes, then transfer to a wire rack to cool completely.
🧁 Step 2: Make the Cream Cheese Filling
- Whip the cream to soft peaks.
- In a separate bowl, beat the cream cheese with icing sugar and vanilla until smooth and fluffy.
- Fold in the whipped cream on low speed until combined.
🎂 Step 3: Assemble the Cake
- Level the tops of the cooled cakes by trimming off any domes.
- Slice each cake horizontally to create 4 thin layers in total.
- Crumble the trimmed tops in a food processor to make red velvet crumbs for decoration.
- Place the first layer top-side down. Spread a layer of filling, repeat until all layers are stacked.
- Apply a thin crumb coat to seal the cake and chill briefly.
- Finish with remaining filling or substitute whipped cream (125 ml cream + 1 tbsp sugar) for final decoration.
- Add 12 rosettes on top, a 1½ inch border of crumbs at the bottom, and sprinkle crumbs on the rosettes.
Chill for at least 2 hours, preferably overnight.
🍽 Serving Suggestions
- Serve chilled or slightly cool for the best texture.
- Perfect with a cup of coffee or a glass of milk.
- Great for birthdays, Valentine’s Day, Christmas, or wedding anniversaries.
🧊 Storage Tips
- Store the cake covered in the fridge for up to 5 days.
- Can be frozen (unfrosted) for up to 2 months. Thaw in the fridge overnight before assembling.
🔄 Variations and Substitutions
- No buttermilk? Use 400 ml milk + 1½ tbsp lemon juice or white vinegar. Let sit for 10 minutes.
- No red food coloring? Try beetroot powder or juice for a natural alternative.
- Add a twist: Mix in orange zest or raspberry preserves between layers.
- Filling option: Swap cream cheese for mascarpone for a milder taste.
❓ FAQ
Q: Can I make this cake ahead of time?
A: Yes! It actually tastes better after resting overnight in the fridge.
Q: Can I use this recipe for cupcakes?
A: Absolutely! Bake at 350°F (175°C) for about 18–20 minutes. Makes 24 cupcakes.
Q: My cake layers turned out dense—why?
A: Be sure not to overmix the batter once dry and wet ingredients are combined.
This classic Red Velvet Cake is the perfect balance of elegance and indulgence. With its striking color, velvety crumb, and creamy filling, it’s a timeless treat that never fails to impress. Whether it’s for a holiday, celebration, or just because—you can’t go wrong with this showstopper.
